
Marble countertops represent the pinnacle of natural stone elegance. These metamorphic masterpieces have graced palaces, monuments, and the world’s most distinguished residences for millennia. At Imperial Marble, we understand that choosing marble is not merely a design decision; it’s a commitment to preserving living geology within your home. This comprehensive guide reveals the science-backed methods that protect your marble’s luminous beauty and ensure it remains an heirloom for generations.
The Anatomy of Marble: Why It’s Different from Granite
The Chemistry That Defines Marble
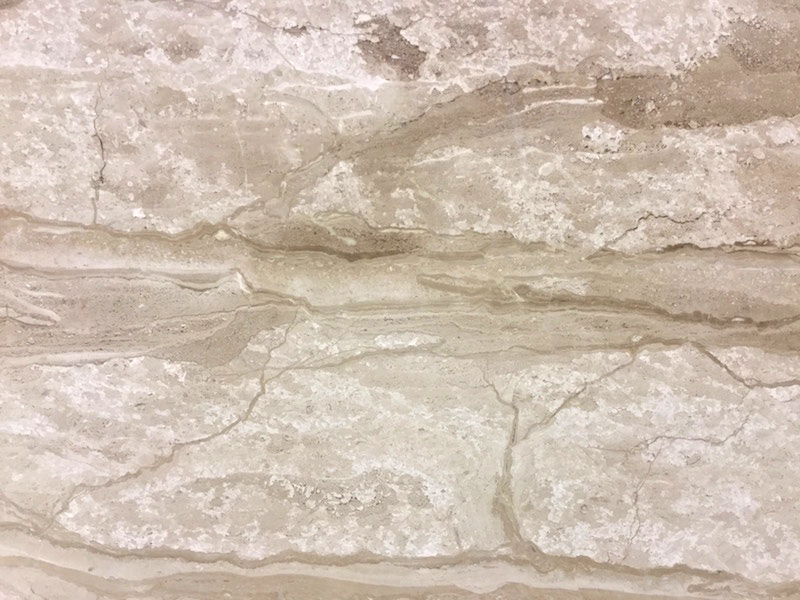
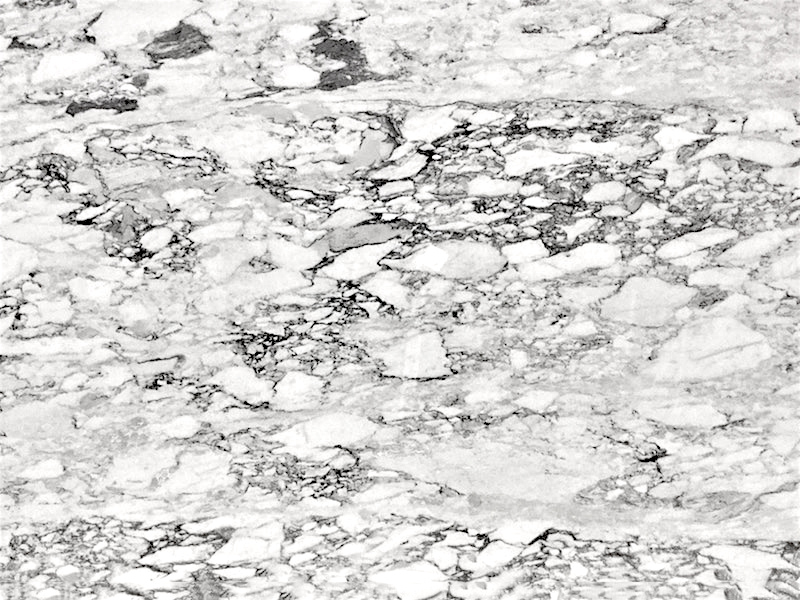
Understanding marble begins with understanding its fundamental composition. Unlike granite, which forms from cooling magma deep within the Earth, marble is metamorphic limestone that has been transformed by heat and pressure over millions of years. The critical distinction lies in its chemical makeup: marble is composed primarily of calcium carbonate (CaCO₃), the same compound found in seashells and chalk.
This calcium-based composition creates marble’s characteristic luminosity and veining, but it also establishes its most significant vulnerability. Calcium carbonate reacts chemically with acids, and this reactivity fundamentally shapes how you must care for your marble surfaces.
On the Mohs Hardness Scale, marble registers between 3 and 4, making it softer than granite (which scores 6–7) and significantly softer than quartz. This relative softness means marble can scratch more easily, but the greater concern is its chemical sensitivity rather than its physical hardness.
Additionally, marble possesses a highly porous capillary structure. Think of marble as a dense sponge with millions of microscopic channels running through its crystalline matrix. These capillaries can absorb liquids, oils, and pigments, which is why sealing becomes absolutely essential for marble maintenance.
Etching vs. Staining: The Critical Distinction
Most marble damage falls into two distinct categories, and confusing them leads to ineffective treatment attempts. Understanding the difference between etching and staining is fundamental to proper marble care.
Etching (Chemical Damage):
Etching occurs when acidic substances (anything with a pH below 7) contact your marble surface. The acid literally reacts with the calcium carbonate, dissolving microscopic portions of the stone in a chemical reaction that produces carbon dioxide and water. This reaction happens instantly upon contact.
Etched marble appears as dull, lighter-colored “ghost” spots or rings where the polished surface has been chemically burned away. The texture feels slightly rough compared to the surrounding polished marble. Critically, etching is not a stain; it’s actual surface damage. No amount of cleaning will remove an etch mark because the material itself has been altered.
Common etching culprits include:
- Citrus fruits and juices (lemons, limes, oranges, grapefruit)
- Tomatoes and tomato-based products
- Wine, both red and white
- Vinegar and vinegar-based dressings
- Soft drinks and carbonated beverages
- Coffee (when acidic)
Staining (Absorption Damage):
Staining occurs when colored liquids or oils penetrate marble’s porous structure and become trapped within the stone’s capillaries. Unlike etching, stains don’t damage the surface structure; they discolor it from within.
Stained marble appears darker than the surrounding stone, with the discoloration seeming to come from beneath the surface rather than sitting on top of it. The surface texture remains smooth and polished (assuming no etching has also occurred).
Common staining agents include:
- Cooking oils and grease
- Red wine and berry juices
- Coffee and tea
- Cosmetics and toiletries
- Rust from metal objects
- Organic matter (leaves, food particles left to decompose)
The treatments for etching and staining differ completely. Etching requires re-polishing to restore the surface, while staining requires extraction through poulticing. Many marble problems involve both etching and staining simultaneously (for example, spilled red wine that both etches and stains), requiring layered remediation.
Daily Rituals: The 30-Second Clean
Marble care thrives on prevention and immediacy. The most effective marble maintenance strategy takes mere seconds but must be executed consistently.
The Blotting Principle:
When spills occur on marble, your first instinct should be to blot, not wipe. Wiping spreads the liquid across a larger surface area, increasing the potential damage zone. Instead, use an absorbent cloth or paper towel to blot up spills from the outside edges moving inward, containing the liquid to the smallest possible area.
For acidic spills (wine, citrus juice, soda), speed is absolutely critical. The chemical reaction begins within seconds of contact. Blot immediately, then flush the area with water and blot again. This dilutes the acid and minimizes etching damage.
The Daily Cleaning Protocol:
For routine daily cleaning, marble requires nothing more than warm water and a pH-neutral stone soap. The pH-neutral designation is not optional; it’s mandatory. Even mildly alkaline cleaners (pH above 8) can gradually dull marble’s finish over time, while acidic cleaners cause immediate etching damage.
Mix a few drops of pH-neutral stone soap in warm water. Dampen a soft microfiber cloth with this solution; the cloth should be damp but not dripping wet. Wipe your marble surfaces using gentle, circular motions. The goal is to remove surface dirt and oils without saturating the stone.
The Critical Drying Step:
After cleaning, immediately dry the surface with a clean, dry microfiber cloth. Never allow water to air-dry on marble. Water (especially hard water) contains dissolved minerals that can leave deposits and create dull spots or rings. Additionally, standing water can seep into marble’s pores, potentially leading to moisture-related staining or even internal stress cracks in extreme cases.
For quick cleanups between deeper cleaning sessions, you can use a spray bottle containing isopropyl alcohol diluted with equal parts water. This solution provides gentle disinfection without chemical residue. Spray lightly, wipe with microfiber, and buff dry immediately.
The 30-Second Habit:
Establishing this routine takes discipline initially but quickly becomes automatic. After meal preparation, before bed, and after bathroom use, a quick wipe-and-dry takes 30 seconds and prevents 90% of marble damage. This small daily investment eliminates the need for intensive restoration down the road.
The Imperial “Do Not” List
Marble’s calcium carbonate composition makes it vulnerable to a surprising array of household products. Some of these dangers are obvious, but others hide in plain sight as “natural” or “gentle” cleaning solutions.
The Obvious Offenders:
Vinegar, lemon juice, and other citrus-based cleaners top every “avoid” list for marble care, yet they remain the most common causes of accidental etching. Despite their reputation as effective, natural cleaning agents for other surfaces, these acids are catastrophic for marble. A single cleaning with vinegar can permanently dull the entire surface, creating a hazy appearance that requires professional re-polishing to correct.
Similarly, bleach and ammonia-based cleaners (like most glass cleaners) cause both chemical damage and sealant degradation. The harsh alkalinity disrupts marble’s crystalline structure over time and strips away protective sealants, leaving your stone vulnerable to staining.
The Hidden Acids:
Many homeowners unknowingly damage their marble with products they never consider acidic:
Diet Sodas and Energy Drinks: The phosphoric acid and citric acid in carbonated beverages are particularly aggressive etchants. A sweating can of soda left on marble for an hour can leave a permanent ring.
Toothpaste: Most toothpastes contain mild abrasives for cleaning teeth and may include acidic compounds like sodium fluoride. Using marble bathroom vanities as staging areas for morning routines frequently results in toothpaste etching around sink areas.
Certain Natural Cleaners: Products marketed as “green” or “natural” often contain citrus extracts, vinegar derivatives, or other plant-based acids. Always check ingredient lists for any compound ending in “-ic acid” (citric, phosphoric, acetic) or containing citrus terminology.
Fruit and Vegetable Residues: Tomatoes, berries, and stone fruits contain natural acids. Even brief contact during food preparation can cause etching. Cutting boards are non-negotiable for marble countertops.
Bathroom Products: Hair dyes, nail polish remover (especially acetone-based formulas), astringents, and many skincare products contain acids or harsh solvents. These represent the primary etching hazards for marble bathroom vanities.
Abrasive Materials:
Beyond chemical concerns, physical abrasion threatens marble’s polished finish. Avoid:
- Scouring powders and abrasive cleansers
- Rough sponges and scouring pads
- Steel wool and scrub brushes
- Grit-containing soaps
Marble’s softness (3–4 on Mohs scale) means even seemingly gentle abrasives can create micro-scratches that accumulate into visible dullness.
The Standing and Sitting Prohibition:
Never stand or sit on marble countertops. While this applies to all stone surfaces, marble’s relative softness and lower tensile strength make it particularly vulnerable to cracking under concentrated weight, especially near unsupported edges and cutouts.
The Science of Sealing: The Water-Bead Test
Sealing represents your marble’s primary defense against staining. While sealers cannot prevent etching (which is chemical surface damage), they dramatically reduce the stone’s ability to absorb staining agents.
Understanding Impregnating Sealers
The type of sealer you choose matters tremendously. Imperial Marble exclusively recommends impregnating (penetrating) sealers over topical sealers, and understanding this distinction is crucial.
Impregnating sealers penetrate into marble’s pores and bond within the stone’s capillary structure. They work by lining the internal channels with a hydrophobic (water-repelling) substance, blocking the absorption of liquids while allowing the stone to breathe and release moisture vapor. This prevents staining without trapping moisture that could cause internal damage.
Topical sealers create a coating on the stone’s surface, similar to varnish on wood. While this sounds protective, topical sealers present significant problems for marble: they can yellow over time, create a plastic-looking finish that obscures marble’s natural beauty, trap moisture beneath the coating leading to discoloration, and require complete stripping and reapplication when they fail.
For marble countertops, impregnating sealers preserve the stone’s natural appearance and feel while providing superior long-term protection.
The Water-Bead Test: Monitoring Your Seal
The water-bead test provides definitive, visual evidence of your sealant’s effectiveness. This simple test should be performed regularly to catch seal failure before staining occurs.
How to Perform the Test:
- Ensure your marble is clean and completely dry.
- Pour approximately two tablespoons of water onto the surface in several locations: high-traffic areas near the sink, the main work surface, and less-used corners.
- Observe the water’s behavior and note the timing.
Interpreting Results:
Immediate beading (water forms tight droplets that sit on the surface): Your sealant is fully functional. No action needed. Test again in 3 months.
Beading that forms within 1–3 minutes: Your sealant is beginning to weaken but still provides protection. Plan to reseal within the next 4–6 weeks.
Absorption within 5 minutes (water darkens the marble): Your sealant has significantly degraded. Reseal within the next week to prevent staining.
Immediate absorption (water is instantly absorbed, stone darkens immediately): Your marble is essentially unsealed. Reseal immediately. Avoid using the surface with staining agents until resealing is complete.
Sealing Frequency: Variables That Matter
The question “How often should I seal marble?” has no single answer. Several variables determine optimal sealing frequency:
High-traffic scenarios requiring sealing every 3–6 months:
- Kitchen countertops used daily for meal preparation
- Marble surrounding sinks and food preparation zones
- Bathroom vanities in master bathrooms with daily use
- White and lighter-colored marbles, which often show higher porosity
- Honed (matte) finishes, which are more porous than polished finishes
Moderate-use scenarios allowing sealing every 6–12 months:
- Decorative surfaces with limited practical use
- Darker marble varieties with naturally lower porosity
- Polished finishes (which are slightly less porous than honed)
- Guest bathroom vanities and powder rooms
- Marble maintained exclusively with pH-neutral products
Application Best Practices:
When applying sealer, ensure the marble is thoroughly clean and completely dry. Apply the impregnating sealer according to manufacturer instructions, typically in a thin, even coat. Allow the recommended dwell time (usually 15–30 minutes) for the sealer to penetrate. Remove any excess sealer that hasn’t absorbed; allowing excess to dry on the surface can create a hazy appearance. Finally, allow the full cure time (typically 24–72 hours) before heavy use or exposure to water.
For Imperial Marble installations, we apply commercial-grade impregnating sealers under controlled environmental conditions during installation. This professional application typically provides 6–12 months of protection before homeowner maintenance becomes necessary, establishing a strong foundation for your marble’s longevity.
The “Poultice” Rescue: Removing Stubborn Stains
Despite vigilant care, stains occasionally penetrate marble’s protective seal. The poultice method offers the most effective remediation for absorbed stains, using absorption principles to reverse the staining process.
A poultice works by creating a paste that draws staining agents out of the stone’s pores as it dries. The poultice material absorbs moisture from the stone, and as this moisture evaporates, it carries the staining agent with it, depositing it in the poultice rather than the marble.
The Baking Soda Method for Oil Stains
Oil-based stains from cooking oils, grease, cosmetics, and lotions create dark spots that seem to come from within the stone. These respond well to alkaline poultices.
Materials needed:
- Baking soda (sodium bicarbonate)
- Water
- Plastic wrap
- Painter’s tape
- Plastic scraper or spatula
Step-by-step process:
- Clean the stained area with pH-neutral soap and water, then dry completely.
- Create a thick paste by mixing baking soda with just enough water to achieve a consistency similar to peanut butter or spackle. The paste should be thick enough to stay in place without running.
- Apply the paste over the stain in a layer approximately 1/4 to 1/2 inch thick. Extend the poultice at least one inch beyond the visible stain boundaries, as staining often extends further than what’s visible on the surface.
- Cover the poultice completely with plastic wrap, sealing the edges with painter’s tape. This prevents the poultice from drying too quickly, which would reduce its effectiveness.
- Allow the poultice to cure for 24–48 hours. During this period, the paste will slowly draw oil from the marble’s pores.
- After the cure time, remove the plastic wrap and allow the poultice to dry completely (an additional 24 hours). As the final moisture evaporates, it brings residual oil with it.
- Use a plastic scraper to gently remove the dried poultice, then clean the area with pH-neutral soap and water.
- Inspect the results. For stubborn stains, repeat the process up to three times. Some deeply penetrated oil stains may require multiple applications.
- Once the stain is removed, reseal the area to restore protection.
The Peroxide Method for Wine and Organic Stains
Organic stains from coffee, tea, wine, fruit juices, and biological matter (leaves, food particles) require an oxidizing agent to break down the pigments responsible for discoloration.
Materials needed:
- Baking soda
- Hydrogen peroxide (3% concentration, standard drugstore strength)
- Plastic wrap
- Painter’s tape
- Plastic scraper
Step-by-step process:
- Clean and dry the stained area thoroughly.
- Create a paste by mixing baking soda with hydrogen peroxide instead of water. Add the peroxide gradually until you achieve a thick, spreadable consistency.
- Apply the peroxide-based poultice over the stain in a 1/4 to 1/2 inch layer, extending at least one inch beyond the visible stain.
- Cover with plastic wrap and seal the edges with painter’s tape.
- Allow the poultice to work for 12–24 hours. Organic stains typically require less cure time than oil stains because the hydrogen peroxide actively breaks down the staining compounds through oxidation.
- For particularly stubborn organic stains, position the covered poultice in indirect sunlight if possible. UV light enhances hydrogen peroxide’s oxidizing action, accelerating stain breakdown.
- Remove the plastic wrap and allow the poultice to dry completely.
- Scrape away the dried poultice and clean the area with pH-neutral cleaner.
- Assess the results and repeat if necessary. Most organic stains respond well to 1–2 applications.
- Reseal the treated area once stain removal is complete.
Rust and Metal Stains: The Exception
Rust stains from metal objects (cans, planters, fixtures) require specialized rust-removing poultices containing compounds specifically formulated to chelate iron oxide. These are available from stone care suppliers and should be used according to manufacturer instructions. Do not attempt to treat rust stains with standard poultice methods, as they will be ineffective.
Important Poultice Cautions
Never use acidic poultice ingredients on marble. Some online sources recommend lemon juice or vinegar in poultices; these will etch your marble while attempting to remove the stain, creating a worse problem.
Always test poultice materials on an inconspicuous area first, particularly when using commercial stain removers or specialized formulations.
For extremely stubborn stains or stains of unknown origin, consult professional stone restoration specialists before attempting treatment. Some stains require professional equipment and expertise to remove without causing additional damage.
The Toiletry Tray Concept: Protecting Marble Vanities
While most marble care guides focus exclusively on kitchen countertops, bathroom vanities face unique challenges that require specific protective strategies.
The Bathroom Chemical Arsenal
Bathrooms contain concentrated collections of products specifically formulated to be chemically active, and many of these chemicals are hostile to marble:
Perfumes and Colognes: These contain high concentrations of alcohol and essential oils that can penetrate marble’s pores and cause discoloration. The oils may darken the stone, while certain fragrance compounds can create yellowish staining.
Nail Polish and Remover: Nail polish itself can stain marble if spilled. Acetone-based removers are particularly aggressive sealant strippers and can cause chemical etching in high concentrations.
Hair Care Products: Hair dyes represent perhaps the most aggressive staining agents in residential environments, capable of creating permanent discoloration in minutes. Hair sprays, mousses, and styling products contain resins and polymers that can build up on marble surfaces, creating sticky, discolored patches.
Skincare and Cosmetics: Astringents, toners, and acne treatments often contain salicylic acid or glycolic acid, which etch marble on contact. Foundation, mascara, and oil-based cosmetics can stain.
Medications and Supplements: Liquid medications, particularly those containing artificial colors, can stain marble. Iron supplements are notorious for creating rust-colored stains.
The Protective Tray Strategy
The solution to bathroom marble protection is elegantly simple: create physical barriers between products and stone.
Decorative Trays: Place attractive trays, preferably with slightly raised edges, under all toiletry bottles and containers. These catch drips, spills, and condensation before they contact marble. Choose trays in materials like ceramic, glass, or coated metal that complement your bathroom design.
Corner Caddies and Organizers: For shower marble or tub surrounds, install corner caddies or hanging organizers that keep bottles off marble surfaces entirely.
Towel Protocols: When performing hair coloring, nail care, or other potentially messy bathroom tasks, lay towels over the vanity surface, extending beyond the edges. This creates a sacrificial layer that catches spills before they reach marble.
Immediate Cleanup: Keep dedicated microfiber cloths in bathroom drawers for immediate blotting of any spills. The proximity of cleaning tools dramatically increases the likelihood of quick response.
Bathroom-Specific Sealing
Because bathroom products are particularly aggressive, and because bathrooms experience higher humidity levels than kitchens, bathroom marble benefits from more frequent sealing. Test your bathroom marble monthly using the water-bead test, and plan to reseal every 3–6 months in master bathrooms with daily use.
The combination of protective barriers and vigilant sealing keeps bathroom marble pristine despite the chemical challenges these spaces present.
Long-Term Maintenance & Professional Restoration
Even with meticulous daily care, marble eventually requires professional intervention to maintain its original beauty.
When to Call Imperial Marble
Certain conditions exceed the scope of homeowner maintenance and require professional expertise:
Widespread Etching: If your marble has developed numerous dull spots from accumulated acid exposure, professional re-polishing is the only solution. This process uses progressively finer diamond abrasives to remove the damaged surface layer and restore the original polish.
Deep or Stubborn Stains: Stains that don’t respond to multiple poultice applications may have penetrated beyond the reach of surface treatments. Professional stone specialists have access to stronger compounds and extraction equipment.
Cracks and Chips: Physical damage requires professional repair using color-matched epoxies and specialized bonding techniques. Attempting DIY crack repair typically results in visible, discolored repair lines.
Loss of Luster: Over years of use, marble can develop a general dullness that cleaning doesn’t resolve. Professional honing and polishing restore the depth and clarity of the stone’s finish.
Lippage Correction: In tiled marble installations (backsplashes, floors), individual tiles may settle unevenly over time, creating “lippage” where edges don’t align. Professional grinding and re-polishing can level the surface.
The Annual Professional Cleaning
Even without visible problems, annual professional cleaning provides value that homeowner maintenance cannot replicate. Professional stone care specialists use commercial-grade, stone-specific cleaners at concentrations unavailable to consumers. They identify early warning signs (microscopic etching, beginning seal failure, developing fissures) before they become visible problems. Their deep cleaning removes buildup from grout lines (in tiled installations) and restores clarity to sealed surfaces.
This annual service acts as preventive maintenance, catching small issues before they require expensive restoration.
The Grout Consideration for Tiled Marble
If your marble installation includes tiled surfaces (backsplashes, shower walls, floors), grout care requires special attention. Grout is typically more porous than marble and can harbor stains and mildew if neglected.
However, most grout cleaners are highly alkaline or acidic, formulated to break down organic matter and stains. These cleaners can damage marble if they contact the stone during grout cleaning.
Safe grout cleaning for marble installations:
Use only pH-neutral grout cleaners specifically labeled as safe for natural stone. Apply the cleaner carefully to grout lines only, using a small brush to prevent overspray onto marble. Immediately wipe any cleaner that contacts marble surfaces. After grout cleaning, rinse thoroughly with clean water and dry completely.
For stubborn grout stains, consider professional grout cleaning services that use equipment designed to target grout without affecting surrounding marble.
The Thermal Shock Consideration
While marble is relatively heat-resistant (capable of withstanding temperatures up to 400°F without structural damage), it remains vulnerable to thermal shock. This lesser-known hazard occurs when marble experiences rapid temperature changes.
The Physics of Thermal Shock:
Marble expands when heated and contracts when cooled. When one portion of a slab experiences rapid temperature change while surrounding areas remain at ambient temperature, internal stresses develop. Repeated thermal cycling or extreme temperature differentials can cause micro-cracks that propagate over time.
Common thermal shock scenarios:
Placing a frozen item (ice bucket, frozen food container) on sun-warmed marble that has been heated by direct sunlight creates a localized cold spot that contracts rapidly while surrounding stone remains expanded.
Moving between extreme temperatures, such as placing a hot pot (300°F+) directly on marble immediately after it has been cleaned with cold water, creates bidirectional stress.
Outdoor marble installations in climates with extreme seasonal temperature swings face continuous thermal cycling that can accelerate crack development.
Prevention strategies:
Use trivets and hot pads under all cookware, regardless of marble’s heat tolerance. This eliminates thermal stress entirely. Allow frozen items to sit on trays or towels rather than directly on marble. For outdoor marble, ensure proper installation techniques include expansion joints that accommodate thermal movement. Avoid drastic temperature changes; if marble has been heated by sun exposure, allow it to return to ambient temperature before introducing cold items.
Establishing Your Maintenance Calendar
Consistent, scheduled maintenance prevents the accumulation of damage and extends marble’s lifespan indefinitely.
Daily:
- Blot spills immediately
- Wipe with damp microfiber cloth and pH-neutral cleaner
- Buff dry with clean microfiber cloth
Weekly:
- Deeper cleaning with pH-neutral stone soap
- Inspection for new etching or staining
- Bathroom vanity tray cleaning
Monthly:
- Water-bead test in high-traffic areas
- Grout inspection (for tiled installations)
- Product inventory check to ensure only pH-neutral cleaners are in use
Quarterly:
- Comprehensive water-bead testing across all marble surfaces
- Poultice treatment for any identified stains
- Evaluation of sealant effectiveness
Semi-Annually:
- Resealing of high-traffic areas (if water-bead test indicates)
- Professional assessment (optional but recommended)
Annually:
- Complete resealing of all marble surfaces
- Professional deep cleaning and inspection
- Evaluation for any necessary restoration work
This calendar transforms marble care from reactive crisis management into proactive preservation.
Embracing Marble’s Living Beauty
Marble is not a static surface; it’s a living element that evolves with your home. The patina that develops over years of use, the subtle variations in how light reflects off its crystalline structure, the knowledge that this stone witnessed geological epochs before becoming part of your daily life these qualities make marble irreplaceable.
At Imperial Marble, we believe that understanding marble’s vulnerabilities doesn’t diminish its appeal; it deepens your appreciation for its unique character. The care requirements that might seem demanding at first become second nature, simple habits that preserve extraordinary beauty.
The water beading on your marble vanity after your morning routine confirms your sealant’s vigilance. The trivet beneath your coffee pot honors the stone that formed beneath ancient seas. The microfiber cloth in your cleaning kit represents your partnership with geological time.
Your marble has survived millions of years of metamorphic transformation. With informed care, it will gracefully endure the decades of memories you create around it, maintaining its imperial standard through generations of your family’s story.