
Most countertop care guides are written by people who sell cleaning products. This one is written by the fabricators who cut, finish, and install the stone. The perspective is different, and so is the advice.
At Imperial Marble, we work with granite every day, from raw slab selection to the final polish. What we know about caring for granite comes from understanding what it is at a material level, not from reading the label on a spray bottle. This guide gives you that same foundation so your investment performs and looks exceptional for decades.
The Science of Granite: Why Quality Care Protects Your Investment
Granite is an igneous rock, formed when magma cools slowly deep within the Earth under enormous pressure. That geological process produces one of the hardest, most mineral-dense stones used in residential construction. Quartz, feldspar, and mica crystallize together into a surface that resists heat, scratching, and most mechanical wear with minimal effort on your part.
But granite is not impervious. Despite its density, granite contains a network of microscopic pores and grain boundaries between its mineral crystals. Left unsealed, those pores can absorb oils, acidic liquids, and pigmented substances over time, allowing stains to work their way below the surface where no surface cleaner can reach them.
This is the core principle behind all granite care: the stone itself is nearly indestructible, but the seal protecting those microscopic pathways requires consistent attention. Care for the seal, and the granite takes care of itself.
A Note on Color and Porosity
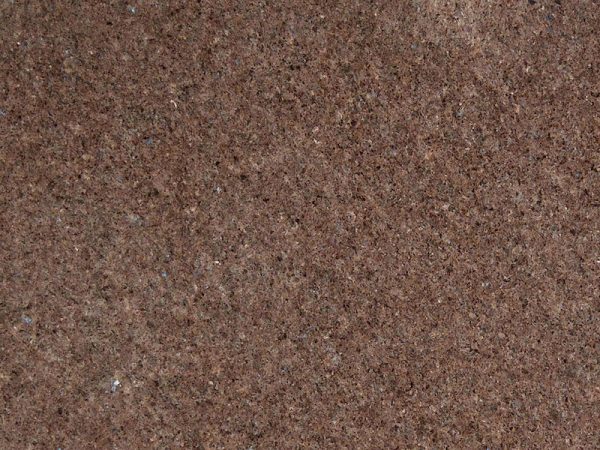
Not all granites are equally porous, and understanding your specific stone matters. Darker granites like Absolute Black are among the densest stones available. Their mineral structure is so tight that they absorb very little moisture and, in some cases, require minimal sealing compared to lighter varieties. Lighter granites like Colonial White, with their broader mineral grain and higher feldspar content, tend to be more porous and benefit from more frequent sealing and attentive daily care. When we install your stone, we note which category it falls into so you are never applying unnecessary product or neglecting a surface that genuinely needs protection.
Daily Maintenance: The “Imperial Shine” Ritual
Consistent daily habits are what separate granite that looks as good at fifteen years as it did on installation day from stone that looks tired and dull within a few seasons. The routine itself is simple.
The Daily Cleaning Standard
Warm water and a pH-neutral dish soap are all you need for daily countertop cleaning. Apply with a soft microfiber cloth, work across the surface in gentle passes, and follow with a clean dry cloth to prevent water spots. That is the complete protocol for routine maintenance.
Do not use abrasive sponges or scrubbing pads, even on stuck-on food. A brief soak with warm water loosens most residue without any mechanical force on the surface.
The Blot, Don’t Wipe Rule
When a spill occurs, resist the instinct to wipe. Wiping spreads the liquid across a larger surface area and pushes it toward the grain boundaries and pores in the stone. Instead, blot the spill by pressing a clean cloth directly onto it and lifting straight up. Repeat until the liquid is absorbed. Then clean the area normally with your pH-neutral solution.
This single habit prevents most of the staining situations homeowners attribute to “bad granite” or “failing sealer.” The sealer is often fine. The wiping reflex is the problem.
Chemical Hazards: What Never to Use on Your Granite
The cleaning product aisle is not designed with stone fabricators in mind. Several products that are marketed as natural, safe, or multi-surface are genuinely damaging to granite, and the damage accumulates gradually, which is why homeowners often do not connect the product to the problem until the polish is already dull and the seal is compromised.
Acids Dissolve Your Seal
Vinegar is frequently recommended in home cleaning guides as a natural, chemical-free alternative to commercial cleaners. On granite, it is one of the most damaging things you can apply. Vinegar is acetic acid, typically at a 5 to 8 percent concentration. Repeated application etches the sealer and, over time, attacks the polished surface of the stone itself, dulling the finish in a way that cannot be reversed without professional re-polishing.
Lemon juice, citrus-based cleaners, and any product that contains citric acid carry the same risk. So does bleach, which breaks down the polymer chains in impregnating sealers and causes them to fail prematurely. Hydrogen peroxide, while used in controlled concentrations for specific stain removal, described later in this guide, should not be used as a routine cleaner.
The pH Reference Standard
A pH-neutral product falls at or very near 7 on the pH scale. Anything significantly below 7 is acidic and harmful to your seal. Anything significantly above 7 is alkaline and can also degrade certain sealers over time with repeated use. When in doubt, look for stone-specific cleaners that explicitly state pH-neutral on the label.
pH-Neutral Cleaners vs. Common Household Acids
| Product | pH Level | Safe for Granite | Effect on Seal |
| pH-Neutral Stone Cleaner | 6.5 to 7.5 | Yes | No degradation |
| Mild Dish Soap (diluted) | ~7 | Yes | No degradation |
| White Vinegar | 2.4 to 3.4 | No | Erodes seal; etches polish |
| Lemon Juice | 2.0 to 2.6 | No | Erodes seal; etches polish |
| Bleach | 11 to 13 | No | Breaks down sealer polymers |
| Multi-Surface Citrus Spray | 3.0 to 4.5 | No | Etch’s surface over time |
| Baking Soda (paste, brief use) | ~8.3 | Limited | Use only for poultice; rinse thoroughly |
| Ammonia-Based Glass Cleaner | 11 to 12 | No | Degrades the sealer with repeated use |
The Sealing Masterclass: Is Your Barrier Intact?
Sealing granite is not a one-time event performed at installation. It is a periodic maintenance task, typically needed every one to three years depending on the stone’s porosity, the sealer product used, and how heavily the surface is used. The good news is that checking your seal takes fifteen minutes, and resealing takes an afternoon.
The 15-Minute Water-Bead Test
Before you purchase a sealer or schedule a resealing session, confirm whether your current seal actually needs refreshing. This test requires nothing more than water and a timer.
- Ensure the countertop surface is clean and fully dry.
- Pour approximately three tablespoons of water onto the granite in an area that sees regular use, such as near the sink or prep zone.
- Leave the water undisturbed for fifteen minutes. Do not touch or spread it.
- At fifteen minutes, observe the water. If it has beaded on the surface and the stone beneath shows no color change or darkening, your seal is performing well.
- If the stone has darkened slightly beneath the water, or if the water has spread and flattened rather than beading, the seal is thinning, and resealing is recommended.
- If the stone has absorbed the water noticeably within fifteen minutes, the seal has failed, and resealing should be completed promptly.
Dry the surface thoroughly after the test, regardless of the result.
Choosing an Impregnating Sealer
There are two broad categories of granite sealer. Understanding the difference matters before you purchase.
Impregnating (Penetrating) Sealers work below the surface. They penetrate the microscopic pores of the stone and cure within the grain structure, creating a sub-surface barrier that repels liquids without altering the stone’s appearance or texture. This is the category we recommend for kitchen and bathroom granite. The stone continues to look and feel like natural stone because the sealer is invisible.
Topical Sealers sit on top of the stone surface and create a coating. They can alter the sheen of the stone, may wear unevenly in high-traffic zones, and generally require more frequent reapplication. They are appropriate for some flooring applications but are not the standard choice for kitchen countertops.
For most Imperial Marble installations, we use and recommend a high-quality fluoropolymer-based impregnating sealer. When in doubt about which product to use on your specific stone, contact us before applying anything. The wrong sealer on a very dense granite can actually inhibit the stone’s natural vapor transmission and cause adhesion issues over time.
Preventing Physical Damage: Heat, Scratches, and Weight
The care habits that prevent staining are different from the habits that prevent physical damage. Both matter, and the physical damage category is where we see the most avoidable repair situations.
Thermal Shock and Heat
Granite handles sustained heat well. It does not scorch, warp, or discolor under normal cooking conditions. However, a rapid temperature differential across a localized area of the surface introduces stress at the mineral grain boundaries. This is thermal shock, and it is the mechanism behind most heat-related cracks in countertops.
The most common scenario: a slab has been sitting in direct sunlight through a west-facing window all afternoon. Its surface temperature may be 90 to 100 degrees. A cook pulls a frozen item from the freezer and sets it directly on that hot stone. The temperature differential concentrated in that small area creates micro-stress in the stone. A single event rarely causes visible damage. Repeated events over months create cumulative stress that can eventually result in a hairline crack.
The solution is simple and costs nothing: use trivets. A trivet under a hot pan, a silicone mat under a cold mixing bowl, and the habit of not placing ice-filled trays directly on a sun-warmed countertop eliminate this risk.
Scratches and Abrasion
Granite rates between 6 and 7 on the Mohs hardness scale. Most cookware, cutlery, and everyday kitchen objects rate below this. Under normal use, granite will not scratch from a knife or pot. However, dragging a cast-iron skillet with a rough base across the surface repeatedly, or using the countertop as a cutting surface over time, can introduce surface abrasion. Use a cutting board. Not because the knife will damage the granite, but because the granite will damage the knife, and the repeated dragging of metal across stone will eventually affect the polished surface.
Point Loading and the Sink Cutout
This one matters for long-term structural integrity and is not discussed in most care guides.
A granite countertop distributes its weight across the cabinet structure below it. That system is balanced and stable. What disrupts it is point loading, meaning concentrated force applied to a single location rather than distributed across the surface.
The most common example: standing on the countertop to reach a high cabinet or change a light fixture. The weight of a person concentrated at the edge or corner of a sink cutout creates bending stress at the thinnest, most vulnerable part of the slab. Cutouts for sinks and cooktops are already points of reduced structural cross-section. This is where cracks originate under point-load stress.
Do not stand on granite countertops. Beyond the countertop, this is also a personal safety issue; a crack under load can be sudden.
Edge Protection and the Sink Profile
The edge profile of your countertop, particularly the area immediately adjacent to the sink cutout, is the most common site for chipping. Heavy pots being lifted in and out of the sink, with the base catching the edge as they clear the rim, are responsible for the majority of edge chips we see in the field. Developing the habit of fully clearing the countertop edge before setting down heavy cookware, rather than sliding it across, prevents the most common source of edge damage in active kitchens.
Maintaining Level in Historic Homes
For homeowners in West Chester, Phoenixville, and other areas with older housing stock, one additional factor deserves attention. Historic homes experience cabinetry settling over time as wood frames respond to seasonal humidity changes and the gradual compression of original framing. A countertop installed level over cabinets that subsequently settle unevenly loses its support distribution. Localized gaps between the stone and cabinet base create unsupported spans that become vulnerable to cracking under normal use loads.
If you have noticed your cabinet doors or drawers becoming misaligned over time, have a fabricator assess whether your countertop installation remains fully supported. Shimming and resupport are straightforward corrective measures that prevent significant damage.

The Rescue Guide: How to Remove Stubborn Stains
Even with careful maintenance, stains happen. The poultice method is the professional approach for drawing subsurface stains out of granite. It works by reversing the absorption process, pulling the staining substance back out through the pores rather than trying to dissolve or scrub it from above.
Understanding Stain Type Before You Treat
The poultice formula changes based on what caused the stain.
Oil-based stains (cooking oil, grease, lotion, cosmetics) appear as a darkened spot that does not lighten over time. These require a poultice with an oil-drawing agent.
Organic stains (coffee, tea, wine, food, leaves, mildew) often have a pinkish or brownish cast and may lighten somewhat on their own over time. These respond to a mild oxidizing agent.
Poultice Method for Oil-Based Stains
- Clean the stained area with warm water and pH-neutral soap. Dry completely.
- Mix baking soda with just enough water to form a thick paste, similar in consistency to peanut butter.
- Apply the paste to the stain in a layer approximately one-quarter of an inch thick, extending slightly beyond the stain boundary.
- Cover the paste with plastic wrap and seal the edges with painter’s tape. This prevents the paste from drying too quickly, which forces the drawing action into the stone rather than allowing it to evaporate from the surface.
- Allow the poultice to sit for 24 to 48 hours.
- Remove the plastic wrap and allow the paste to dry completely. Do not disturb it while wet.
- Once fully dry, gently scrape the dried paste from the surface using a plastic scraper. Do not use metal.
- Rinse the area with warm water and dry thoroughly.
- Assess the stain. If it has lightened significantly, the process is working. For deep stains, a second application may be needed. Allow 24 hours between applications.
Poultice Method for Organic Stains
Follow the same steps as above, with one substitution: replace the water in the paste with 12 percent hydrogen peroxide rather than plain water. The peroxide acts as a mild oxidizer that breaks down the organic pigment while the baking soda draws it out of the pore. Note that this formula is for organic stains only and should not be applied to polished dark granites routinely, as repeated peroxide exposure can affect the polish on some finishes over time.
After any poultice treatment, allow the surface to dry completely for at least 24 hours before resealing the treated area.
Daily, Monthly, and Yearly Maintenance Checklist
| Task | Frequency | Notes |
| Wipe down with pH-neutral cleaner and microfiber cloth | Daily | Warm water and mild dish soap are acceptable |
| Blot spills immediately | As needed | Blot, do not wipe |
| Dry surface after cleaning | Daily | Prevents water spotting |
| Remove standing water near sink edges | Daily | Protects edges and seal at high-moisture zones |
| Inspect for new chips or cracks at sink profile | Monthly | Especially relevant in active kitchens |
| Clean under small appliances and near edges | Monthly | Debris accumulation can trap moisture against stone |
| Perform water-bead test to assess seal integrity | Every 6 months | Use 15-minute water test as described above |
| Reseal if water-bead test indicates seal is thinning | As needed (typically 1 to 3 years) | Use penetrating impregnating sealer appropriate for your stone |
| Assess cabinet level in older homes | Yearly | Critical for West Chester and Phoenixville historic properties |
| Schedule professional inspection if crack or shift is noted | Immediately | Do not allow unsupported spans to persist |
Your Stone Deserves the Attention It Was Built For
Granite was chosen for your home because it performs. Caring for it consistently, with the right products and the right habits, is what ensures that performance holds over the full life of the installation.
At Imperial Marble, we remain a resource for our clients well beyond the installation date. If you have questions about your specific stone, notice something that does not look right, or want to confirm your sealer choice before you apply it, our team is here to advise.
The right stone, properly maintained, is a permanent feature of your home. We help you get both decisions right.